
- Home
- Support
- Zeroing your red dot sight
Step-by-step guide
Step-by-step guide
Below is our step-by-step guide that describes how to proceed regarding zeroing of your sight from Aimpoint. Remember to always treat your firearm as if it were loaded.
Before you start
How to zero your sight from Aimpoint®
Place the firearm in a safe condition prior to handling or performing any of the actions demonstrated below.
Aimpoint® red dot sights are optically centered. That means that if the mount base is properly aligned with your firearm’s action, only minor adjustments should be necessary. It is easiest if you start the zeroing process from a short distance. We recommend 25 meters. This allows you to immediately see if further adjustments need to be made, which in turn can save you time and ammunition.
This method uses Aimpoint® zeroing targets.
Using the Aimpoint® zeroing target
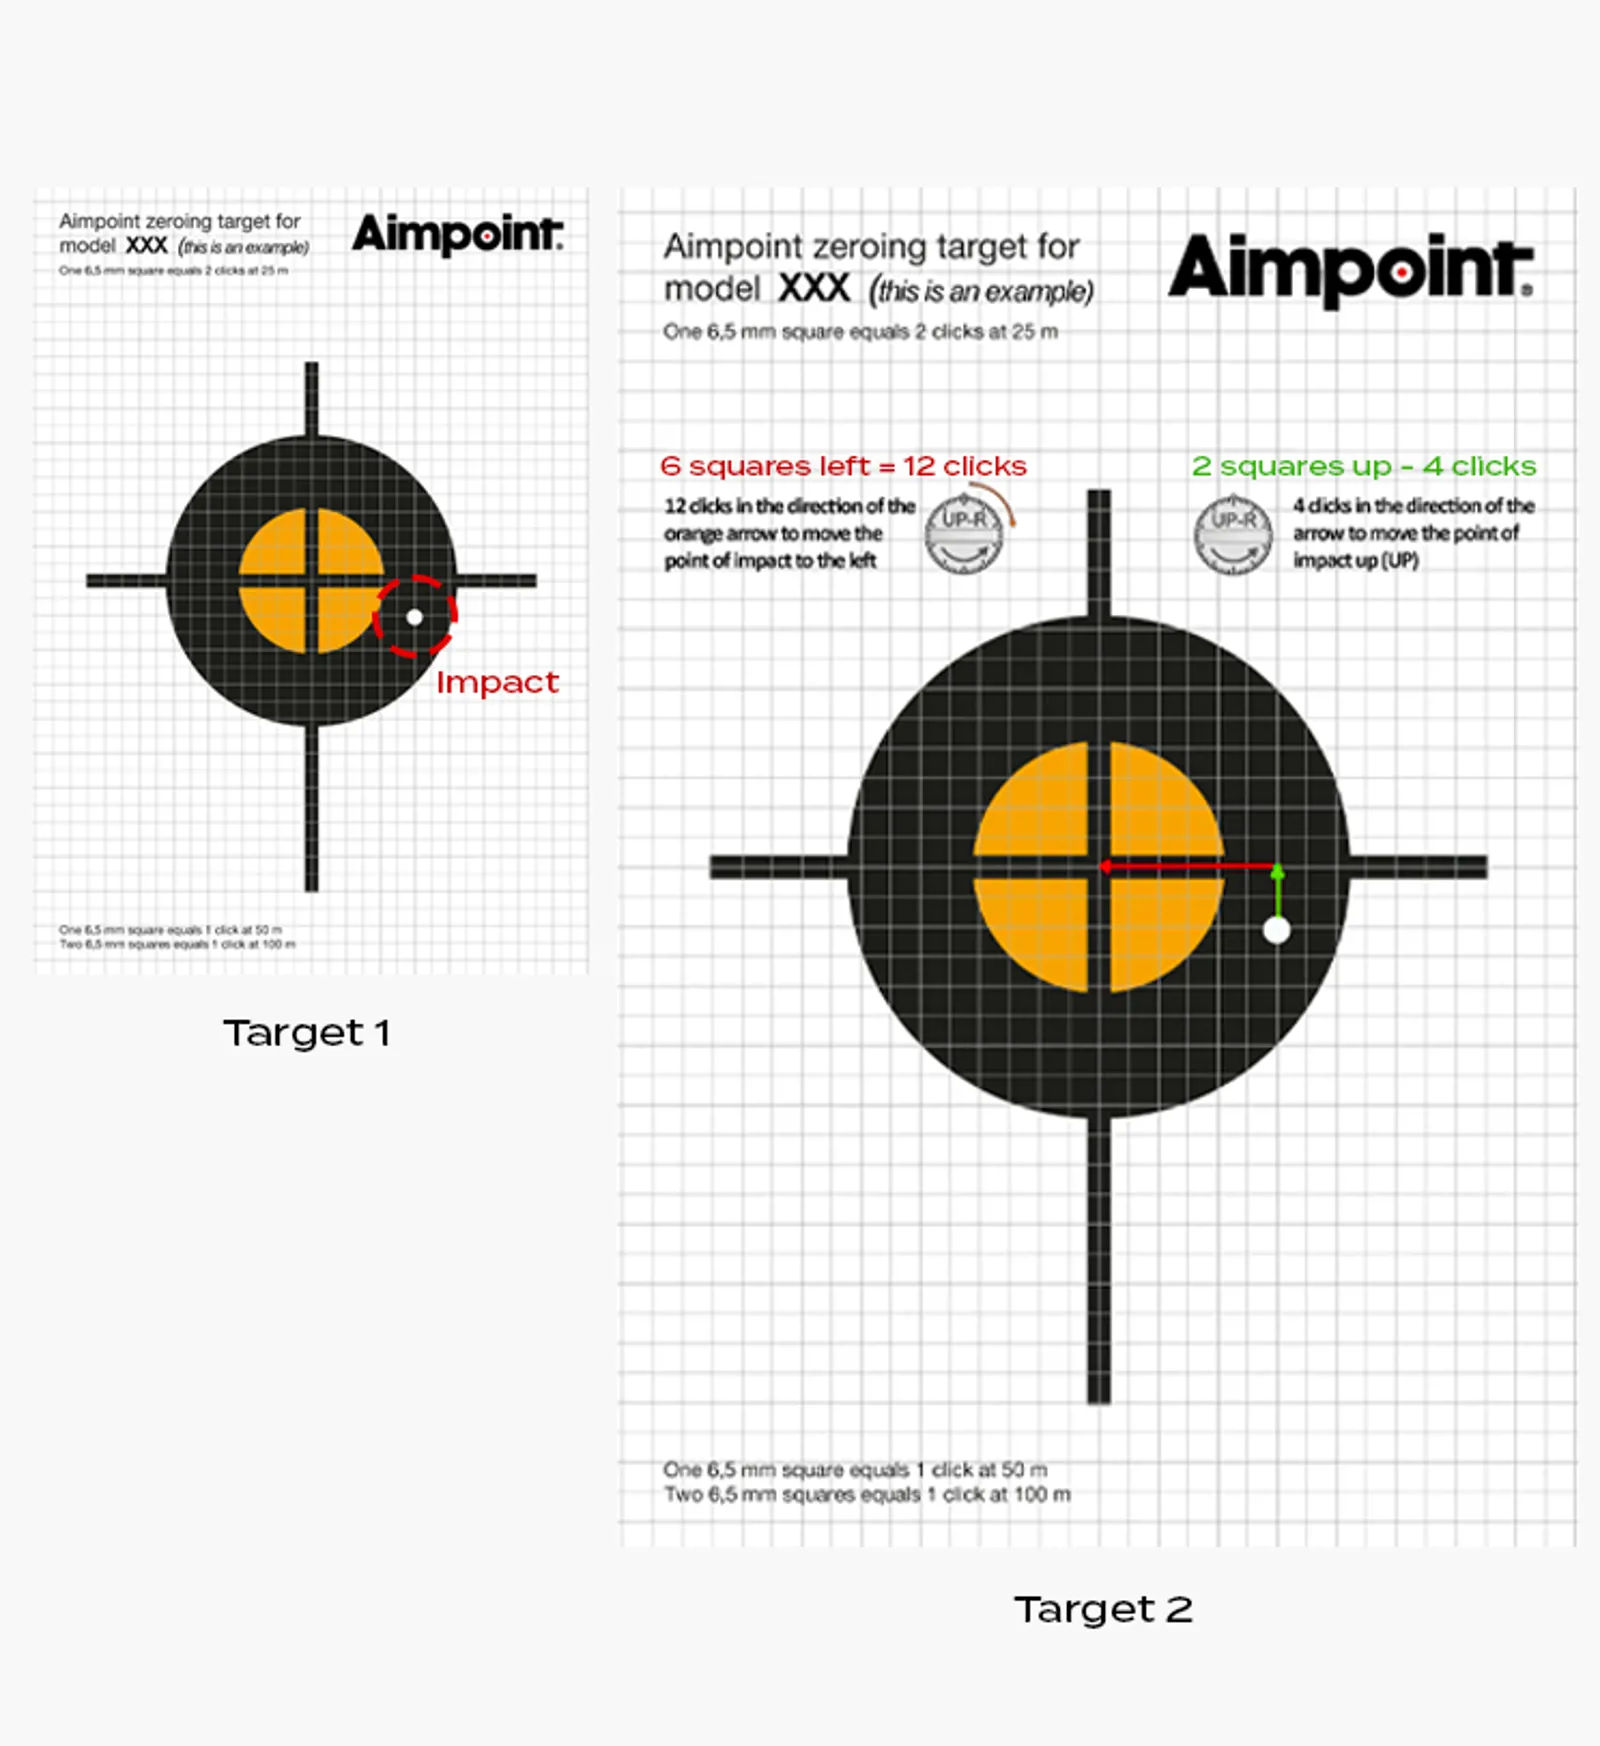
1. Set up the target at 25 meters.
2. Place firearm in solid rest and center dot on the target.
3. Take one shot and inspect the point of impact (see image "Target 1"). This target shows that the point of impact was too much to the right and a little too low.
4. With the information given on top of the printed Aimpoint® zeroing target, and by counting the number of squares between the actual point of impact and the desired point of impact on the target, you can quickly and precisely determine how many clicks you need to move the adjustment screws in order to zero your sight (see image "Target 2").
NOTE! The number of clicks per square is determined by the distance to your target.
5. Take another shot to check that the point of impact is centered. If you still need to adjust slightly, repeat the procedure.
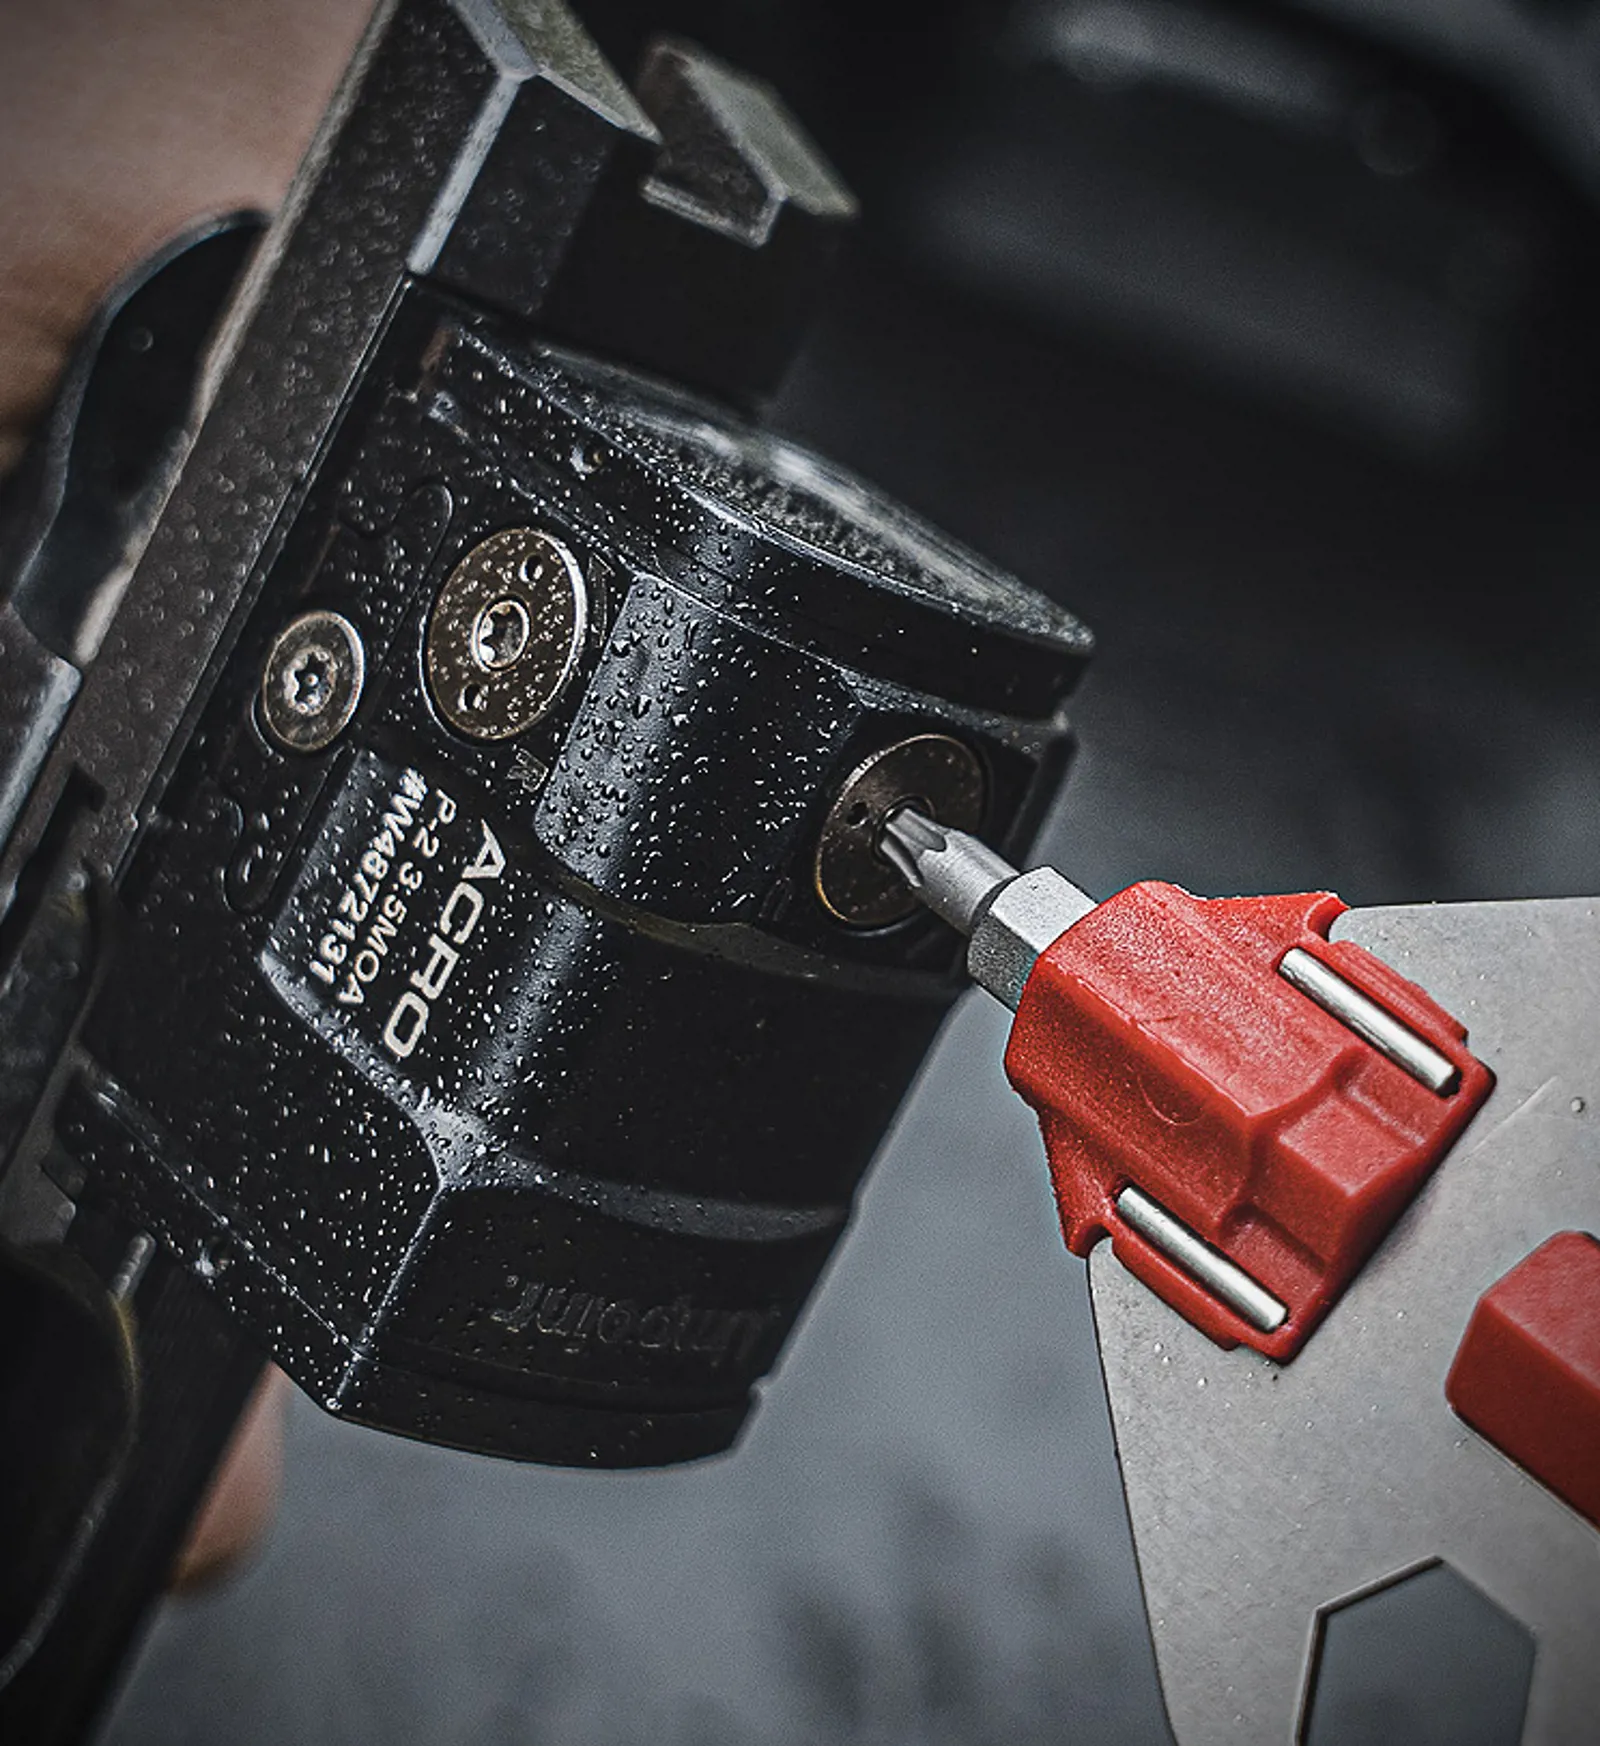
How to operate the adjustment screws
Unscrew and remove the protective caps from the adjustment turrets to access the adjustment screws.
NOTE! The information on the adjustment screws can vary from one sight model to another. It shows either UP-R on both the elevation and the windage screws or UP on the elevation screw and R on the windage screw.
Windage adjustment:
1. On the windage (side to side, or horizontal) adjustment screw, located on the side of the sight, you can see an arrow and "UP-R".
2. Follow the direction of the arrow to move the point of impact to the right (R).
3. Turn in the opposite direction of the arrow if you want to move the point of impact to the left.
Elevation adjustment:
1. On the elevation (up and down, or vertical) adjustment screw, located on the top of the sight, you can see an arrow and "UP-R".
2. Follow the direction of the arrow to move the point of impact up (UP).
3. Turn in the opposite direction of the arrow if you want to move the point of impact down.